*Updated to reflect new research into haze, aroma and flavour*
So, yeah. Love them or hate them – and we LOOOOVE them – the hazy train is clearly here to stay.
And for good reason, as anyone who has tried a well brewed version will attest.
Soft, glowing, luscious body, with just enough malt backbone to stand up to the real star of the show...
The hops! These beers are super hoppy, but not as you know hops.
A well made hazy IPA will be crushable, tropical and JUICY.
Basically, this should taste like an absolute fruit explosion in your mouth. If it doesn’t you're doing it wrong. And sadly, there’s probably more bad examples than good out there, as every man and his dog has jumped on the hazy train.
So don’t feel disheartened if it takes you a couple of brews to get this style down pat – even the pros can struggle.
The NEIPA craze started some years back in New England - hence NEIPA, or New England IPA. Born as a reaction to the crazy bitter over crystal sweet West Coast IPA style that had come to dominate the market, the style became extremely popular and spread to all regions of the States and then on to the rest of the world.
The ‘haziness’ that is a signature of the style is much debated. What causes the haze? Is murky beer any good? Do they need to be hazy? What makes them hazy?
There’s as much bad information as good about this. But we are now at a place where there is a lot more understanding about what creates the haze and thus the unique flavour profile, as well as being able to debunk a few popular misconceptions about the style.
So, how do you brew a delicious, juicy, hazy as hazy IPA?


Let’s dig in.
Firstly, let’s debunk a few myths.
Myth 1: You need massive amounts of hops.
Well, you kinda do, to be fair. But there is definitely a ceiling beyond which the law of diminishing returns kicks in pretty hard, especially when dry hopping. We have seen receipes with, frankly, ridiculous quantities of hops in them. All that will achieve is hop burn and losses of delicious beer to hops.
Myth 2: Bio-transformation.
So, this is not really a myth. Bio-transformation – the unique interaction between yeast and hops during fermentation is absolutely essential to the style. But the idea that you need a massive dry hop during peak fermentation has been thoroughly debunked. Doing this can lead to an indistinct hop flavour, or worse, cause aroma loss as well. There’s a place for it, but you will get better aroma if you do the majority of the dry hop post fermentation.
Myth 3: You need yeast in suspension for the haze.
Look, this is flat out, 100% wrong. And if you are brewing and serving beers where suspended yeast is part of your flavour, then, my friend, shame on you. If you need to shake the bottle or keg to get the haze back in suspension then again – that's not how it works.
Stable, juicy haze in NEIPAs is caused by polymerized polyphenols reacting with proteins. This will happen in the main from the reaction with the yeast and proteins and hop compounds from the brewing process.
Well sure. So how do you actually brew a great Hazy IPA then?
Easy.
Well, no harder than any other style.
Let’s go through this, step by step.
Step 1: The Grist
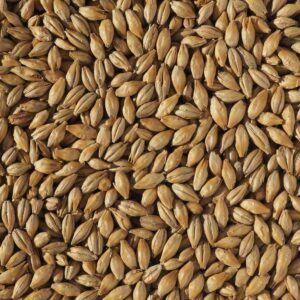
Pretty simple. The malt is never the star of this show. You need base malt – any good pale ale or pilsner malt will work. You might want to add a kilo of Vienna for a hint of sunshine and slightly deeper flavour. You need protein. The easiest way is to simply use wheat or oat malt, or a combination of the two. No need to overdo it – 10-20% of the grain bill is plenty. This has a twofold benefit.
Oats (in particulart) will help with the soft, luscious mouthfeel that we are after. We love using malted oats for ease of brewing. Also, you need to have a fairly protein heavy grist to help acheive a stable haze. It’s not uncommon to use carapils or chit malt or similar, while the jury is out, you may well see an improvement in head retention with a couple of hundred grams. This can also improve body slightly.
You do not want to add much (or any, really) in the way of crystal malts. The bitter/sweetness balance that is so prevalent in an old school IPA has no place in a good hazy IPA. A touch of medium crystal for colour is fine though. You can also add a bit of a darker base malt such as Vienna for more of a golden glow.
Lastly, ABV pays a fairly big part in motuthfeel (in particular). While you can brew great hazies at around 5%, they really start to shine at 6% ABV or more.
Step 2: The Mash.
This is important. Super important. Water chemistry for the mash is going to go a long, long way to making the difference You want to aim for a Chloride: Sulphate ratio heavily skewed towards chloride – aim for anywhere from 200:100 to 150:50. If using Brewfather, the built in Hoppy NEIPA water profile is bang on.
Getting the water chem right will make a huge difference to the mouthfeel and hop profile. We haveexperimented with this, and it makes a bigger difference by far then whether you use oats or not. If you are new to the world of water chemistry, we have a handy guide here, and also a great value starter kit.
Otherwise, mash at 65-67C for 60 minutes, and aim for a pH of around 5.3 or even a touch lower.
Step 3: The Boil.
It is super common for a hazy IPA to have no boil hops at all. You will be adding a pretty substantial charge of whirlpool hops, and even at temperature below isomerization temperatures, you will find that you get a pretty decent charge of bitterness nonetheless. This will be a smoother, more appropriate to style bitterness as less alpha acids will be isomerized. You may want to add a very small 60 minute hop addition, but be careful to not overdo it – it is really important to have a balanced bitterness in this style.
It is quite common to do a shorter boil with hazy IPAs. We typically do a 30 minute boil. There is some evidence that this will help with haze, as well as shorten your brew day.
At the end of the boil, we are going to do a mammoth whirlpool hop charge.
Ideally, we will target around 100-150g per 20L wort. Best case scenario – add the hops when the wort has dropped below 80C, and whirlpool (or just let them steep) for anywhere from 10-40 minutes. You can throw them in at flameout and cut the whirlpool a bit shorter with no ill effects as well. This is an area where you may want to experiment and take notes, as this is where you can dial in the bitterness to suit your palate. I am not a fan of overly sweet hazies – a good backbone is essential for a good beer – but balance is key here.
Step 4: Whirlpool Hops.
The use of hops is absolutely crucial to this style of beer. In the space of a few years, an enormous amount of research has gone into this, and is ongoing, but we know a lot more now then we did when the haze craze first started.
There are a minimum of two important hop additions for a NEIPA. The whirlpool hop addition is crucial to the style – there’s a growing body of evidence that suggests that this addition is largely responsible for both the haze and the ‘juice’ – the hop derived fruity flavours that are a result of biotransformation during fermentation.
While initially any and all of the ‘new world’ hops were added (such as Galaxy, Citra, El Dorado etc), recent research suggests strongly that certain hop compounds will remain present and also potentially either transform or help transform into super saturated juicy flavours. These hops with ‘survivable’ compounds include a fair few of the super fruity new world hops, but also some that might surprise you – Centennial and Idaho 7, for example, are two of the very best hops to use hot side. Taking these compounds into account and mixing and matching carefully can really lift the final product. For more information about this, refer to this fantastic article by Scott Janish who is at the forefront of this research.
The whirlpool hops will contribute a lot of flavour to the finished beer, so choose wisely.
Step 4: Fermentation.
So, fermenting the beer with the right yeast is super important here. We will have a lot of delicious hop oils and compounds in suspension, and we need a yeast that will react to this, achieving the magic known as bio-transformation.
There are several great dry yeast choices. Lallemand's New England and Verdant yeasts are head and shoulders above the rest in this field, with Voss Kveik and Lutra also quite popular, especially if you don’t have temperature control. A lot of people have had success with S-04 as well.
There’s plenty of choice in liquid yeasts as well, but at Kegland we do tend to stick to dry – you just cannot beat the convenience and price. London Fog is one liquid yeast we have used with great effect if you want to go that route.
NEIPA yeasts tend to be British in origin. That means they respond really well to a slightly warm fermentation, and definitely need to be ramped a bit to ensure you don’t end up with diacetyl. A good schedule is to hold at 19°C for 3 days or so, then ramp to 22°C to finish off.
Step 5: The Dry Hop.
This is super important. And yes, we are going to use a lot of hops. I would suggest that 100g per 20L batch is the minimum required to achieve a truly juicy hazy IPA, with 200g being even better! The good news is going much beyond this won’t make an enormous difference. It's quite common to see people using crazy large amounts of dry hops, but the law of diminishing returns kicks in after around 10grams per litre.
If you’ve gotten this far, you probably already know what I mean when I’m talking about hops as pertains to the style. We are going to pretty much exclusively use super fruity, tropical or intense new wave hops. Galaxy. Citra. Sabro. Mosaic. El Dorado. Eclipse. Amarillo. Nelson Sauvin. Lotus. Melba. Vic Secret. You get the idea.
There are also a bunch of new kids on the (hop) block that are cultivated specifiaclly for massive fruit flavours typical of a great NEIPA - check out Nectaron, Lotus, Superdelic, for example.
The timing of the dry hop is important. But not nearly as important as it is made out to be. There’s no real need to add hops during fermentation to get a hazy beer. The large whirlpool hop will ensure there is more than enough hop compounds for bio-transformation. The dry hop will contribute flavour, but more importantly aroma, so adding this at the end of fermentation is better. You will also find this gives a far more clearly defined hop flavour. A really good approach for this style is dry hopping while doing a ‘soft crash’ to around 14°C for 24 hours then cold crashing - this is our preferred approach fopr maximum juice.
You might want to add a dry hop during active fermentation as well. If so, we would recommend using a hop addition high in ‘survivables’ – ideally something complementary to your whirlpool addition - Centennial is a great example.


To brew a NEIPA as successfully as possible, it is a great idea to have a pressure capable fermenter such as a 30L Fermzilla All Rounder. This can make an enormous difference, as after adding the hops you can seal the fermenter and keep every ounce of delicious hop aroma trapped in the beer where it belongs! You can then do a closed, oxygen free pressure transfer to a keg to absolutely maximise freshness and flavour. For a breakdown on why this is so useful, please have a look at this article about pressure fermentation.
You might also want to check out the Hop Bong as well. We designed this essentialy as the best and easiest way for every homebrewer to be able to dry hop their beer with absolutely zero risk of oxidation.
By the way, no one here skips the cold crash for this style (this is often debated online). Again – you want the yeast to drop out of suspension. The beer will be much better after a crash. If you have done everything else right, it will also be soft, juicy and delicious.
By way of a final note, lets talk about haze for a minute.
These beers are called 'hazies' for a reason. they are the antithesis of a clear, light lager, for instance. And thus, it's quite common for brewers to try to brew a 'hazy' beer.
That's completely the wrong approach.
A NEIPA is not about the haze - its all about the juice. The mouthfeel, the flavour and the aroma are the defining characteristics of a good hazy IPA. The haze follows that.
So, don't try to brew a hazy beer. Let's not be adding flour, or shaking the kegs, or not cold crashing - at least, unless you are aiming for a murky, yeasty, potentially hop burning mess.
Follow the tips outlined here and brew a juice bomb.
If your beer is juicy, the haze will happen. Don't sweat it.
Finally, if you want to just get brewing, you can jump online and grab one of our All Grain Recipe kits for a fabulous NEIPA – the Juice Bigalow! This comes with all the grain, hops and yeast you will need, as well as an instruction sheet that breaks all of the above down for you. We are also developing a range of NEIPA recipes that will take advantage of recent research into hop compounds to give the absolute best hoppy punch that you can fit in a beer.
No time to brew! We got you - check out our hugely popular FRESH3 range if you are time limited. We also have a new line of 15MBK (15 minute boil kits) that use extract and steeping grains to great effect - check out the Cosmos NEIPA!
If you are looking to go ahead and brew your own, feel free to use our Brewfather recipe. This recipe is designed for a 35L BrewZilla setup.
Hopefully this helps break down some of the mystique around this style. Really, its no harder to brew than any other style of beer.
Happy Brewing!


