Say goodbye to messy spills and frustrating keg filling processes. The Keg Fill Stopper is a simple yet effective device that transforms how you fill kegs. With this affordable tool, you can ensure clean transfers every time, making it a must-have for homebrewers and craft beer lovers.
What is a Keg Fill Stopper?
Understanding its Components
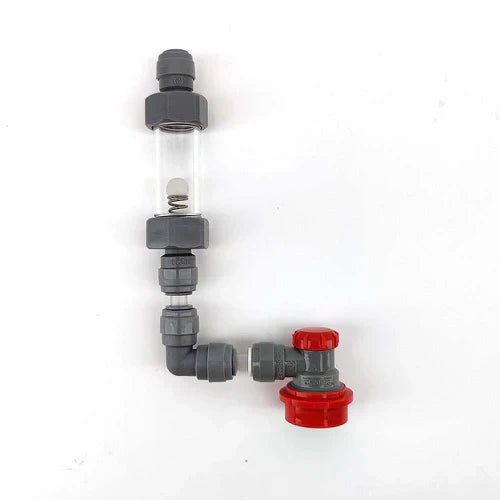
The Keg Fill Stopper consists of several key parts:
- Spring: The same type found in standard poppets, making it easy to find replacements.
- Floating Ball: Custom-made silicon design that regulates liquid flow.
- Fittings: Two 5/8” duo type push fittings with sight glass screws for easy setup.
These components work together to create an efficient filling experience, compatible with your existing keg equipment.
How it Works
This fill stopper operates through a straightforward mechanism:
1. Filling Process: You attach the device to your keg.
2. Float Regulation: As the liquid fills the keg, the floating ball rises.
3. Flow Control: Once the liquid reaches a certain level, the ball shuts off the flow, preventing spills.
This “set and forget” approach is a game-changer for minimizing waste while filling kegs.
Setting up the Fill Stopper
To assemble and attach the Keg Fill Stopper, follow these clear steps:
1. Attach the spring with the tapered end facing down.
2. Place the floating ball on top.
3. Secure the fitting tightly.
4. Connect gas and beer lines appropriately.
Optimizing Your Keg Filling Process
Preventing Dribbles and Spills
To reduce spills while filling, consider these tips:
- Use Extra Beer Line: Attach additional tubing to catch any liquid dribbles.
- Positioning Matters: Ensure the device is oriented correctly during filling.
Head Pressure Control
Maintaining head pressure can significantly improve your keg filling:
- Reduced Foaming: Fill liquid under pressure to avoid bubbles.
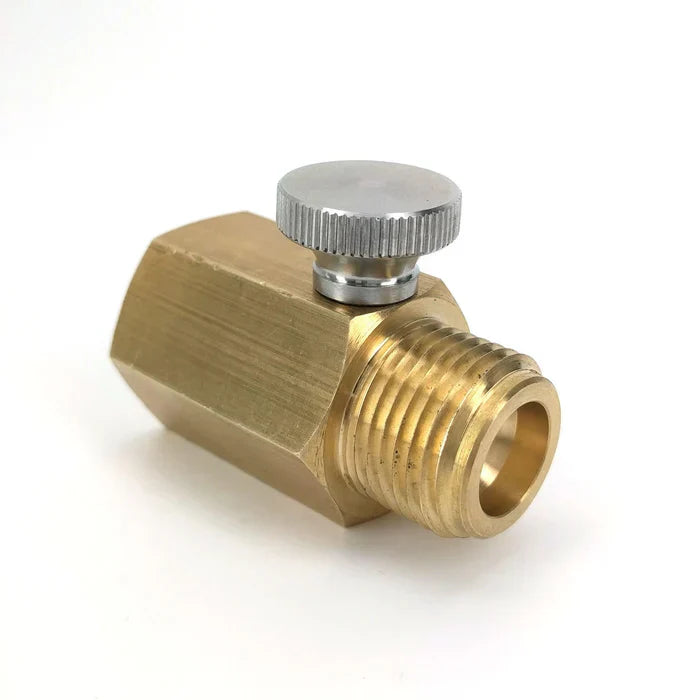
- Adjustable Spunding Valve: This tool can help manage head pressure during the filling process.
A clear understanding of head pressure benefits can elevate your filling technique.
Advanced Applications and Modifications
Filling Different Keg Types
The Keg Fill Stopper adapts easily to various keg sizes. Here’s how:
- Identify keg configurations: Adjust the fitting setup as needed.
- Test and troubleshoot: If problems arise, check alignment and fittings.
Customizing Your Setup
Enhance efficiency with these ideas:
- Attach a Spill Container: Connect a bucket to catch any overflow.
- Use Short Tubing: This keeps the setup neat and reduces the risk of spills.
Addressing Specific Beverage Types
When filling carbonated drinks:
- Control Foaming: Using head pressure helps minimize foam formation.
- Consider Viscosity: Thicker liquids may need additional adjustments.
Maintenance and Troubleshooting
Cleaning and Sanitizing
Proper care of the Keg Fill Stopper is vital:
1. Disassemble the parts carefully after use.
2. Clean each component with sanitizer.
3. Rinse and dry them thoroughly to avoid contamination.
Addressing Common Issues
If you experience issues, here are some solutions:
- No Flow: Check for clogs in the fittings.
- Leaks: Ensure all connections are tight and secure.
Extending the Life of Your Fill Stopper
Keep your device in top shape with these tips:
- Proper Storage: Store in a cool, dry place when not in use.
- Regular Checks: Inspect components periodically for wear and tear.
Conclusion: Streamline Your Homebrewing Experience
The Keg Fill Stopper is an efficient solution for hassle-free keg filling. By integrating this tool into your setup, you can reduce waste and enhance your homebrewing experience. Don’t forget to follow the YouTube channel and Facebook page for updates and exclusive giveaways. Get ready to enjoy a cleaner, smoother keg filling process!


