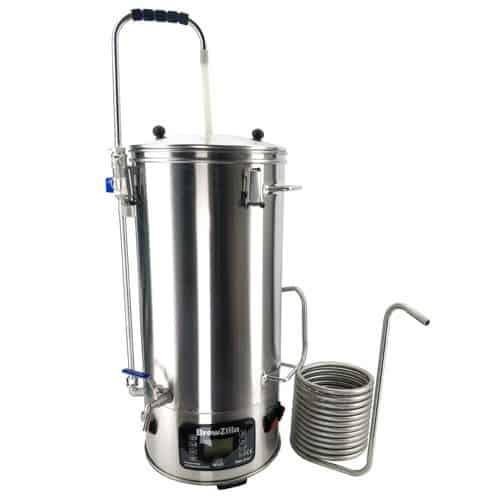
So, you’ve done your research, compared products, realized that the BrewZilla range are pretty much the best value all in one brewing systems on the market. You’ve bitten the bullet, pulled the trigger and a shiny new BrewZilla has landed on your doorstep.
Now what?
Well, you need to brew some delicious beer. Maybe you’re stepping up from extract brewing. Quite likely you have dabbled in BIAB, so you have some familiarity with the brewing process. Almost certainly, you’ve done some research on how these babies actually work.
So I’m here to help share some tips. Hopefully, the little details that you might not realise or appreciate. Hopefully, this will help your first (and subsequent) brew days run that little bit more smoothly. These are the things that I wish I knew for my very first brew with one of these little beauties.
1: Get a Stainless Steel Mash Paddle. Get the Light Duty Mash Paddle for the 35L, or the Heavy Duty paddle if you are rolling with the 65L. Seriously. I thought I could get by with my old plastic spoon leftover from my BIAB days. Yeah. Nah.
2: Grab a jacket for your new toy. These jackets look the business, but far more importantly they really help you both maintain temperature, and to even out the temperature gradient during mashing. No brainer.
3: Let’s talk about temperature gradients, shall we? So, common to all eBIAB systems is the fact that there will be a difference in the temperature of the boiler from the bottom (where the elements are) to the top. It’s OK, though. It’s super easy to compensate for this. Wait for the strike water to come to temp. Using a probe thermometer, take a temperature reading from as close to the middle of the boiler as you can. See what the difference is between that and the indicated temp on the BrewZilla. Make a note. It’s likely only a couple of degrees.
Now, when you want to achieve a set temperature for your mash, adjust the set temperature by that much. On my system, it’s 2c. If I mash at 65c, I set the boiler to 67c. That’s it. Done.
4: Use the pump. Actually, this is a biggie. I’ll repeat that. Use the pump. Use the pump when heating the strike water. It really helps to ensure you get an even temperature throughout the boiler. Use it during the mash, for recirculation – I'll talk more about that in a minute. Use the pump when it’s time to rack the wort into a cube or your fermenter.
Just... use the pump, mmmkay? We literally never use the tap that comes with it.
5: Rice hulls. Chuck a couple of handfuls in with every mash. An eBIAB system is closer to a 3V system in many ways, rather than BIAB. It’s OK to grind a bit finer, but throw in some rice hulls and you will never know the agony of a stuck sparge.
6: Recirculate. One of the major selling points of the BrewZilla is the pump. Use it during the mash to recirculate.
Here’s how. Get your grains doughed in and stirred well. With your ss mash paddle, naturally. Then let everything settle for 10 minutes. After that, you may or may not choose to put the top screen in place – we are about 50/50 in the Kegland office as to whether we use it. After 10 minutes, start the pump, but use the ball valve to control the flow. Keep it gentle. Keep an eye on the water level. Open up the flow as the wort settles. You’ll soon get a feel for it.
7: I was going to save this for last, because it’s kind of our dirty little secret. But hell. I’d just declaimed that I was looking forward to being able to chill my wort properly, using the included immersion chiller. Basically, everyone laughed, and informed me that I should just rack into a cube like everybody else.
So yeah. I discovered that this was universal in the office. We don’t chill here at Kegland. We No Chill, as it is a true blue Aussie invention the ol'no-chill.
No Chill cubes. These are alternatives to the traditional no chill cube that we are quite excited by, as well – Hot Fill Cask Bladders.
Honestly, I love them. I can get home from work, have dinner and get a brew in a cube and the clean up done before bedtime. Wakeup, pitch yeast. Too easy. And a huge water saving. Just join the club.
8: Grab a pro screen!
Do it. Mash just like the pros. Possibly a good idea to get some practice in with the safety net of the overflow system of the standard screen first, but once you go pro, you’ll never go back!
Get the 35L screen here, the 65L pro screen here.
9: You’ll like this one. Way back in tip 6 I talked about using the pump for everything. As you should.
But obviously, you then have silicone tubing dripping often boiling hot wort everywhere. Not cool.
Simple fix – tie it around the arm to which it is attached – a simple loop pointing up means no drips at all.
10. The big one...
Actually, it's not that big. It's... nifty though.
The clamps at the top of the boiler do double duty as the perfect way to hold your mash paddle and hop spider when not in use. Always nice to keep things neat and to hand!
Anyway, I hope that you gained something, whether you are brand new to the BrewZilla or an old hand at all-grain brewing.
Cheers!


